At Mailfence, we strive to make your email experience as secure and private as possible.
With the new Mailfence mobile app, we now bring this commitment right to your fingertips, allowing you to access your secure email wherever you go.
This article details the current functionalities of the Mailfence mobile app, including:
- emails;
- tags;
- folders;
- password encryption;
- end-to-end encryption;
- digital signatures.
As we continue to improve on the feature of the Mailfence mobile app, we will update this article (last update: 14/5/2024).
Our mobile app is also open-source, meaning anybody can inspect the code.
Introducing the Mailfence Mobile App
If you haven’t yet, make sure to download our mobile app:
- on the App Store
- on the Google Play Store
- by downloading and installing the APK file

Composing your first Email with the Mailfence Mobile App
The Mailfence mobile app is a powerful tool that allows your to preserve your online privacy and security wherever you go.
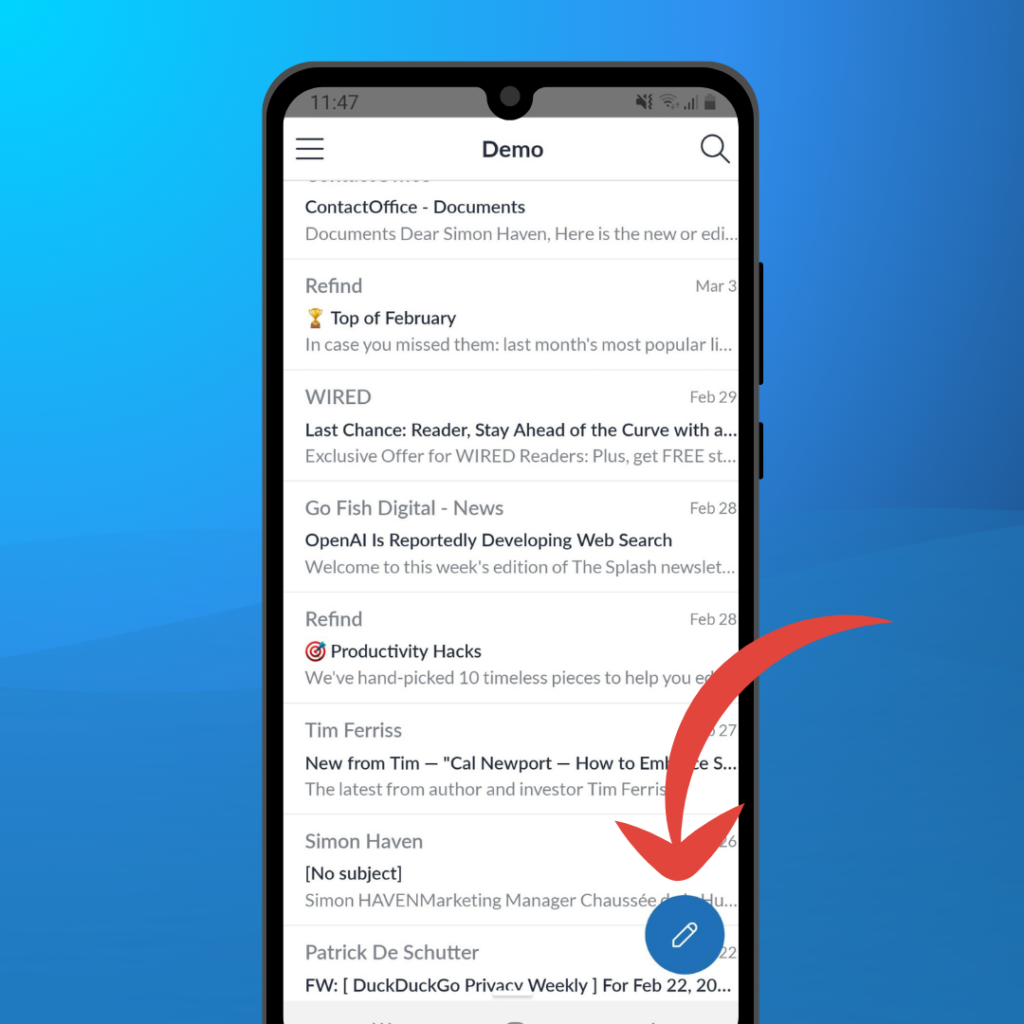
To compose an email, tap the “New message” icon on the bottom-right corner of your screen:
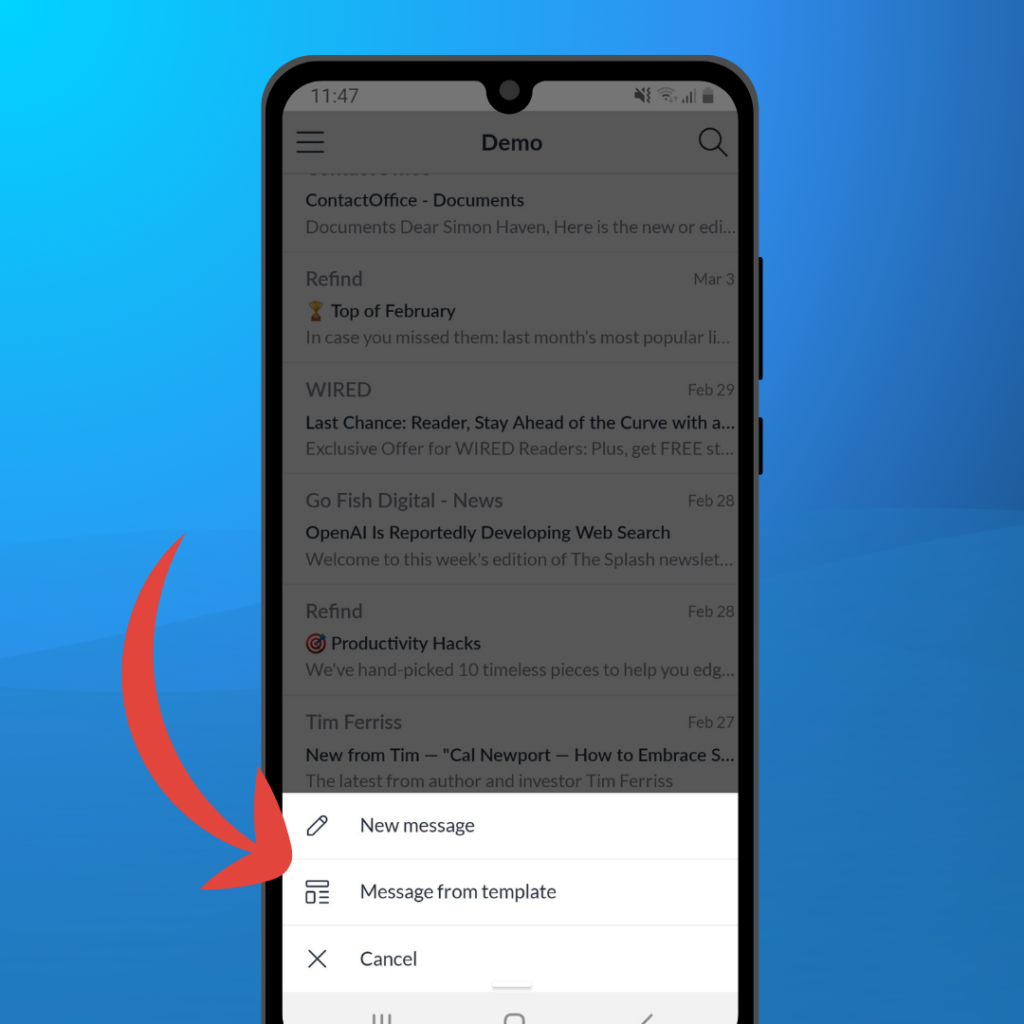
You can also tap and hold the “New message” icon. This will let you:
- compose a new message from scratch
- compose a new message from template
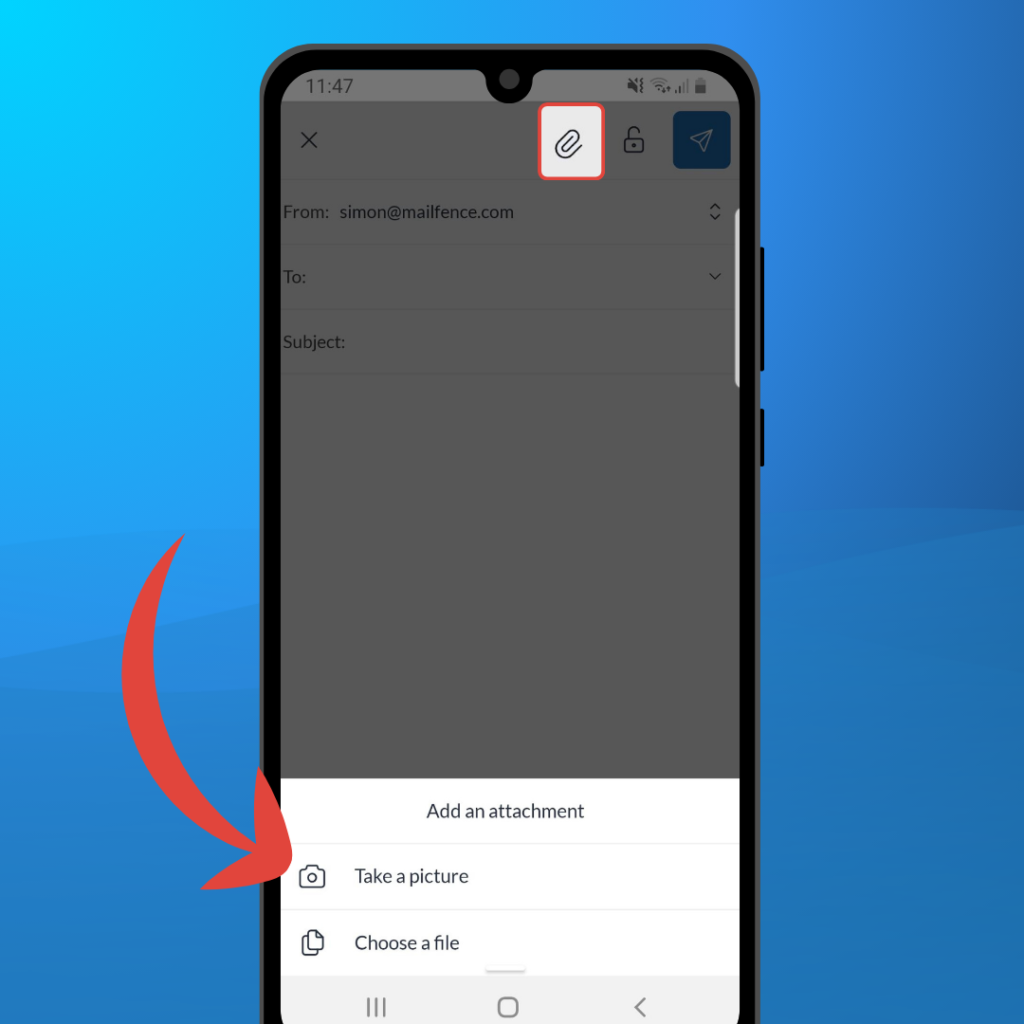
To add an attachment, tap the paper clip icon at the top. You can then choose to:
- take a picture and attach it to your email
- choose a file on your device
Using Tags and Folders
Tags and folders are the best way to keep your inbox organized. Here are all the different options you have:
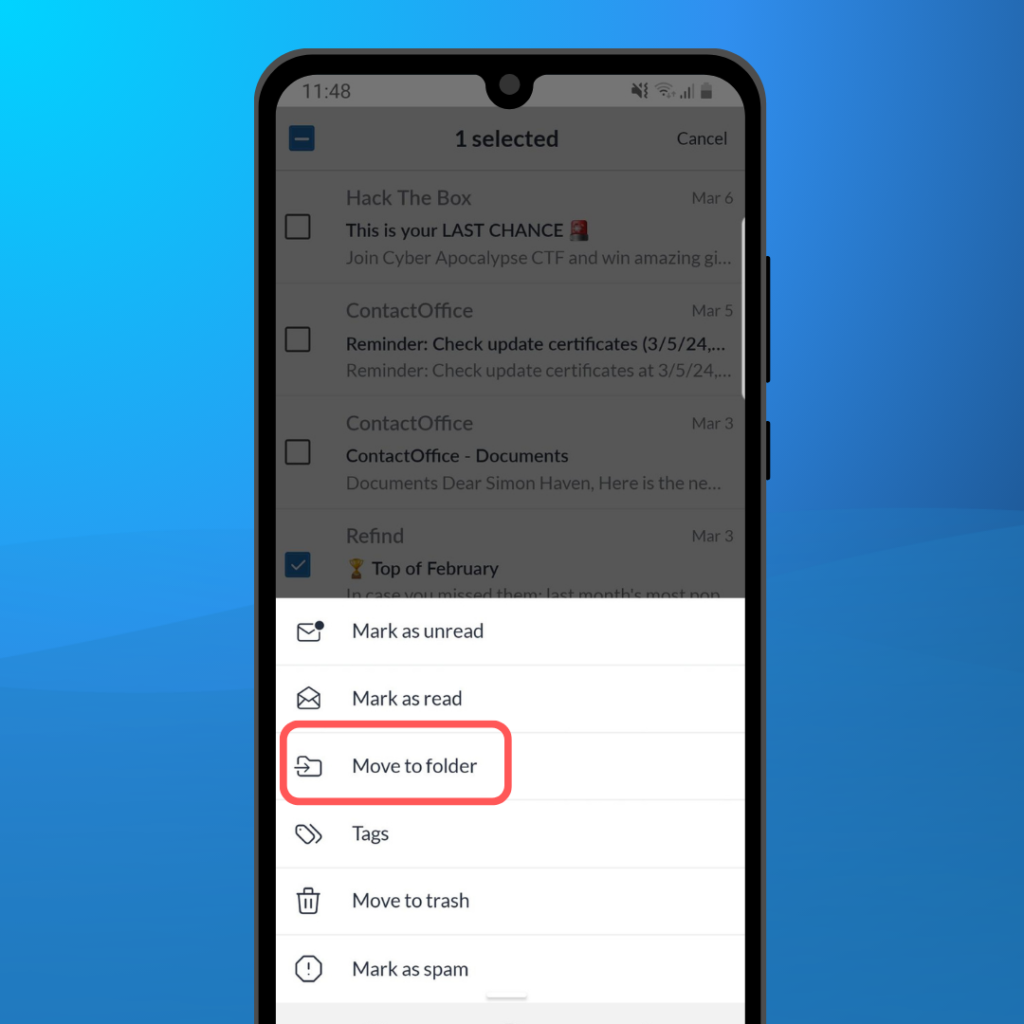
- To move an email to a folder, tap and hold on that email. Then tap the “Move to folder” icon at the bottom-left corner of your screen. Select the folder you wish to move your email to.
- To assign a tag to an email, tap and hold on that email. Then tap the 3-dots “More” menu at the bottom-right corner of your screen. Select “Tags”, then the appropriate tag. Finally, tap “Save”.
- To find an email that has been moved to a folder or assigned a tag, tap the 3-lines “Menu” icon at the top-left corner of the app. You can then select a specific folder or tag to consult.
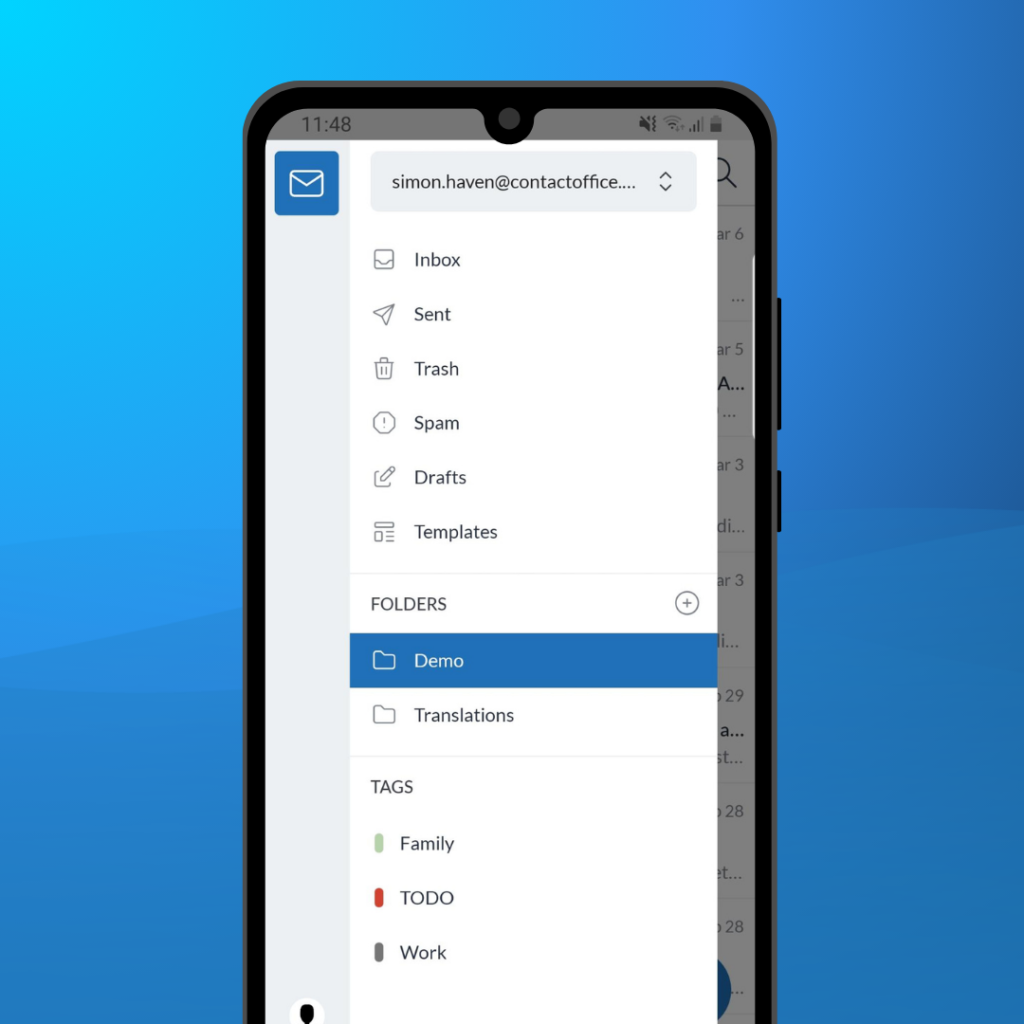
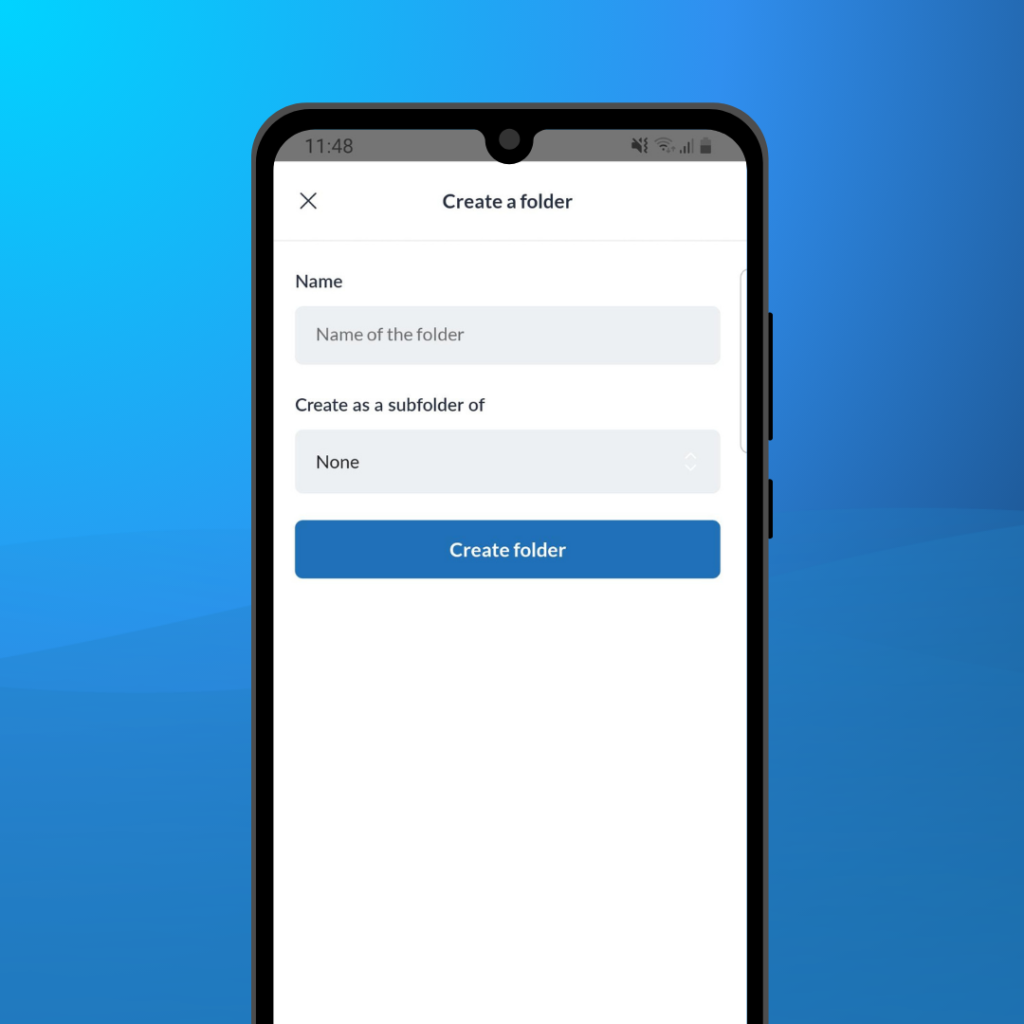
- To create a new folder, tap the 3-lines “Menu” icon at the top-left corner of the app. Next to “Folders”, tap the “+” icon. Choose a name and (optionally) a parent folder, then tap “Create folder”.
Encryption and Digital Signatures
Encryption ensures only you and the recipient can read the content of your conversations.
The Mailfence mobile app offers two types of encryption:
- Password encryption (aka symmetric encryption)
- End-to-end encryption (aka asymmetric encryption)
Using password encryption in the Mailfence mobile app
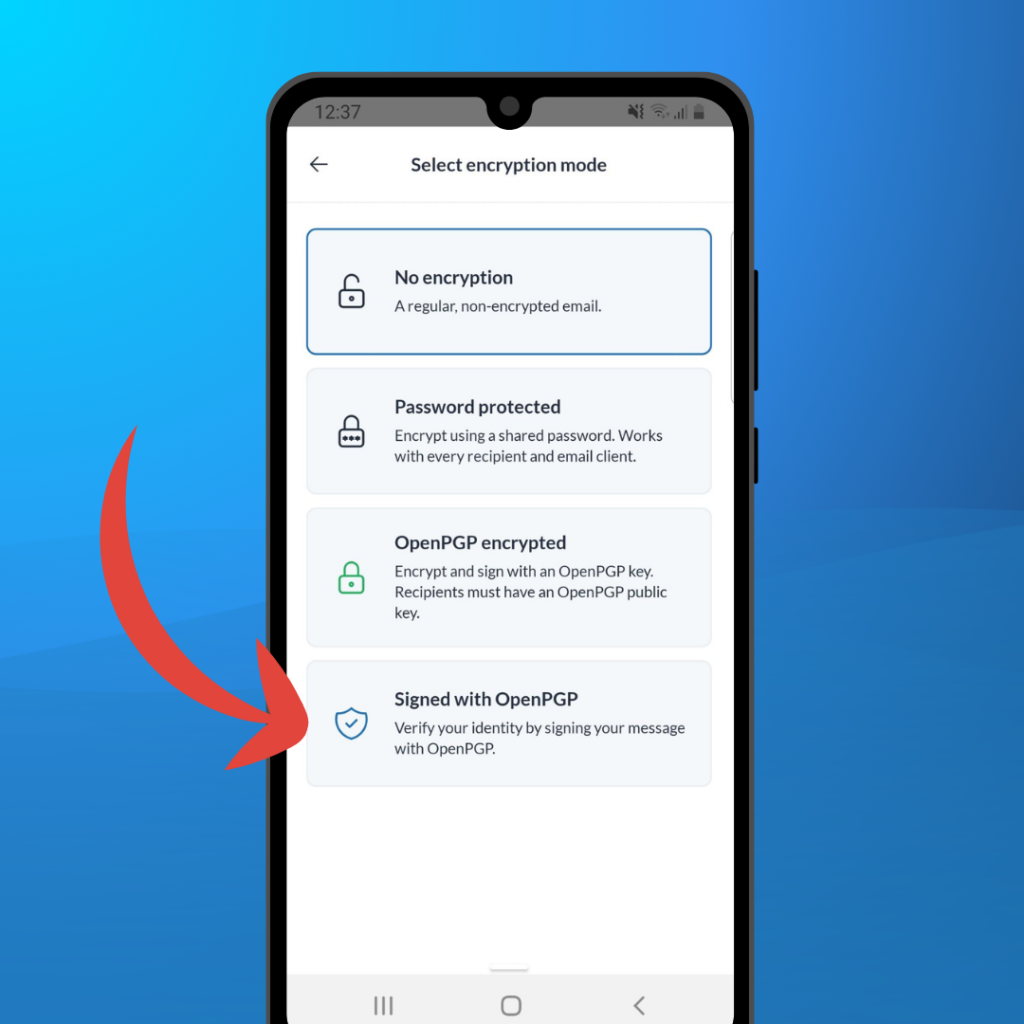
To encrypt an email with a password, start composing a message. Then, tap the “Encryption” icon at the top of the screen.
Next, select “Password protected”. Enter a password, then confirm it.
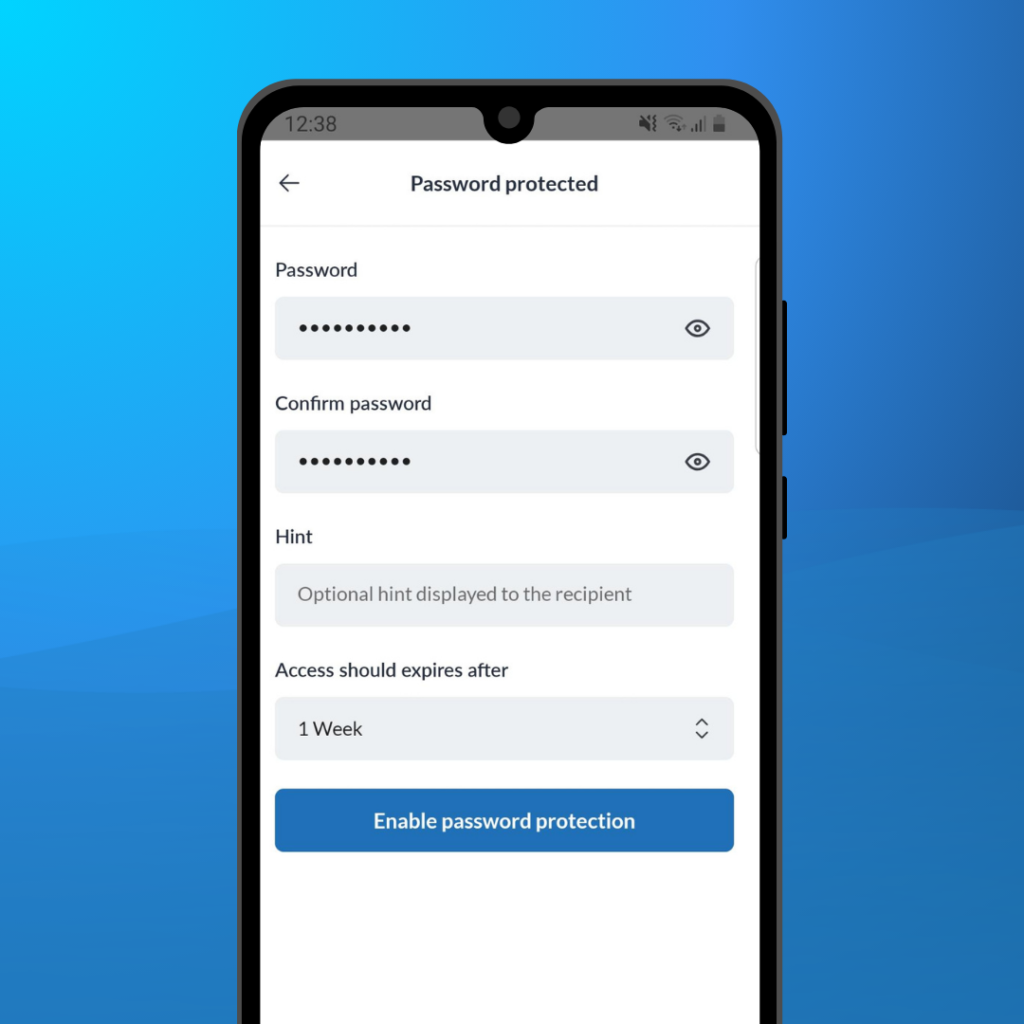
You can also enter a “Hint” that the recipient will be able to read (in case they forget the password). Finally, you can enter an expiry date (up to 4 weeks). After this time, the recipient will no longer be able to access the email.
If you want to learn more about password encryption, check out this guide here.
Using end-to-end encryption in the Mailfence mobile app
Mailfence uses the OpenPGP protocol for its end-to-end encryption. You can learn more about it in this guide here.
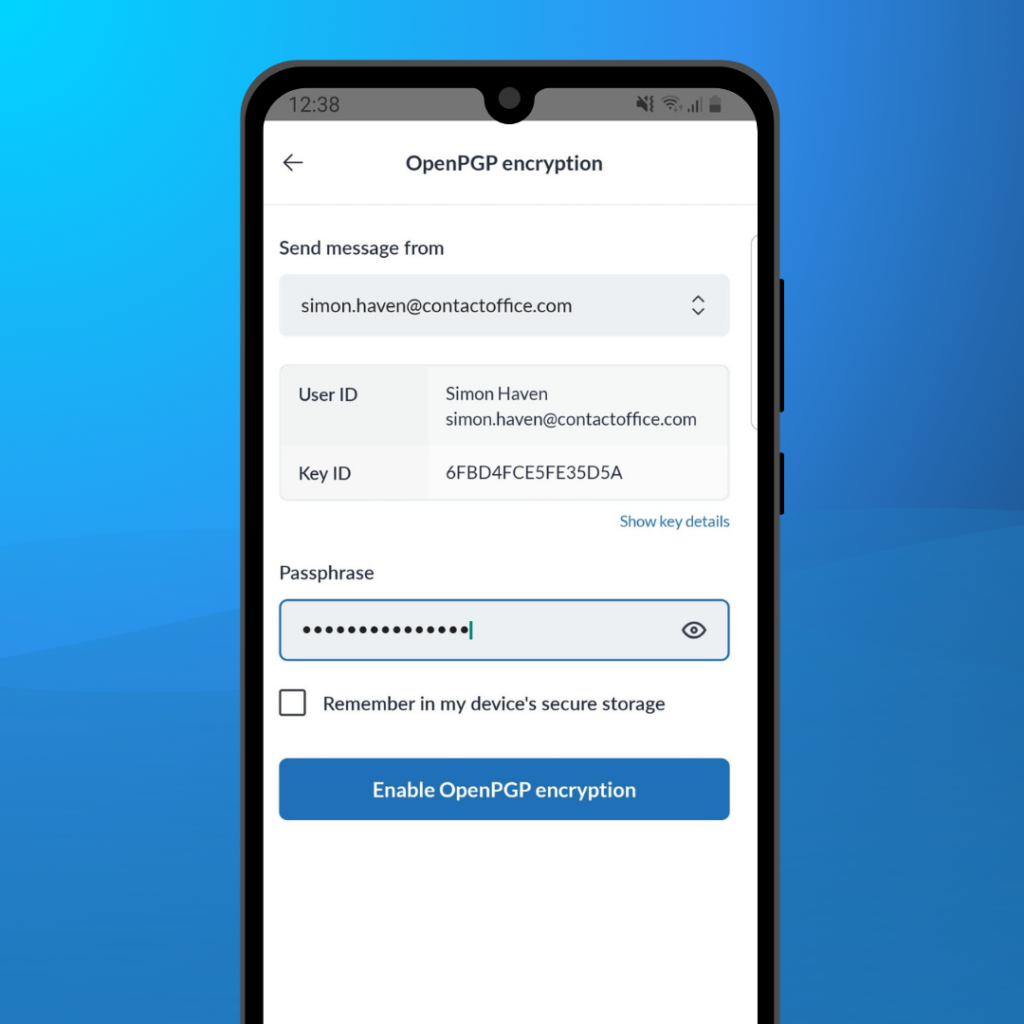
To encrypt an email with a OpenPGP, start composing a message. Then, tap the “Encryption” icon at the top of the screen.
Next, select “OpenPGP encrypted”. Check your key details, then enter your passphrase. Tap “Enable OpenPGP encryption”.
Digital signatures
To sign an email with a OpenPGP, start composing a message. Then, tap the “Encryption” icon at the top of the screen.
Next, select “Signed with OpenPGP”. This will prove to the recipient that you are the authentic sender of the email.
More to Come Soon!
In the near term, we plan to expand the functionalities of the Mailfence mobile app. This will include a fully-featured Calendar, Documents and much more.
Are you having issues with the Mailfence mobile app? Do not hesitate to contact our support to let us know! We will always value your feedback and input as we continue to develop our app.
The post An Introduction to the Mailfence Mobile App appeared first on Mailfence Support.